Setup a MongoDB server with docker


In this post, I will introduce how to set up a MongoDB database server with docker.
The post includes the following sections
- Setup a simple MongoDB database server (easy)
- Setup a secured MongoDB database server with a password
- Secure a currently running MongoDB database server with a password
- Periodically backup MongoDB database to AWS s3
- Connect to MongoDB database server using mongoose for nodejs users
- Convert the server to a replica set
- Upgrade a major version (not straightforward, though)
- Configure SSL connection (TODO)
This post requires the docker to be installed in the setup machine. Refer to the official guide to install docker for ubuntu, mac, windows, or read my article on how to install docker in ubuntu.
NOTE THAT this is for mongo version 5.x and below ONLY. This tutorial does not work with mongo >= 6.x. Because of the following reasons:
mongocli is removed from version 6.x, replaced by the newer toolmongosh. We need to manually download mongosh and copy it to the mongodb docker container.
https://www.mongodb.com/docs/mongodb-shell/
The legacy mongo shell was deprecated in MongoDB 5.0 and removed in MongoDB 6.0- Several features are not compatible with
mongoshsuch as: when an error occurs,mongoreturns a json-formatted string whilemongoshreturns a string.
Withmongo:
 mongo --quiet --eval 'rs.status()'
{
        "ok" : 0,
        "errmsg" : "no replset config has been received",
        "code" : 94,
        "codeName" : "NotYetInitialized"
}
With mongosh:
 mongo --quiet --eval 'rs.status()'
MongoServerError: no replset config has been received
- The official docker image for mongo 6.0.2 does not start with the default configuration. The following error occurs and the server cannot be accessed.
{"t":{"$date":"2022-10-31T17:34:16.330+00:00"},"s":"I", "c":"-", "id":4939300, "ctx":"monitoring-keys-for-HMAC","msg":"Failed to refresh key cache","attr":{"error":"NotYetInitialized: Cannot use non-local read concern until replica set is finished initializing.","nextWakeupMillis":9000}}
I will back to revise this tutorial when things become stable.
Part 1: setup a simple MongoDB server without a password (easy)
Execute the following command
docker container stop mongo; docker run --name mongo -p 27017:27017 -v $HOME/mongo:/data/db --rm -d mongo:4.0.4Command and flags' explanation:
docker container stop mongo: stop the current instance if exist.mongois an arbitrary name, defined in the next command.docker run: initiate a docker instance.---name mongo: name the docker instance in order of the convenience for thestopcommand, or, finding the previously executed instance to restart it.-p 27017:27017: open port 27017 for other applications that can access the database.-v $HOME/mongo:/data/db: map the data stored in the database instance to a host directory, to prevent data loss in the next runs. Here, I chose$HOME/mongo.--rmremove the instance if isstopped. This flag is used almost every time when I usedocker run.-d: detach the process to the background. Even if you execute the command in an ssh session and quit the ssh session, the docker command will continuously run in the background. In a case you want to watch for console output of the docker command, replace-dby-it, after that, you can usectrl-p ctrl-qto move the process to background mode. The full command in this case.
docker container stop mongo; docker run --name mongo -p 27017:27017 -v $HOME/mongo:/data/db --rm -it mongo:4.0.4
# ctrl-p ctrl-q to detachitflag combines-iand-t, which means allocate a terminal (-t)in interactive mode (-i)mongo:4.0.4: official docker image by mongo. I highly recommend using a specific version for production purposes. My above-mentioned command can be copied and used directly in production if you want. You can replace4.0.4with the newer or your favorite version. To get the latest version, usemongo:latest
Part 2: Setup a secured MongoDB database server with a password
Similar to the command in part 1, with the addition of user name and password configuration
docker container stop mongo; docker run -e MONGO_INITDB_ROOT_USERNAME=transang -e MONGO_INITDB_ROOT_PASSWORD=transang-password --name mongo -p 27017:27017 -v $HOME/mongo:/data/db --rm -d mongo:4.0.4 --authNote:
- This command only affects if you initiate the server for the first time. In other words, the directory
$HOME/mongoin the host machine is empty. If you already have a running mongo server I want to secure it with a password, please refer to part 3 in this post - This command includes user and password in plain text. It can be revealed by others who can log in to the machine and access the bash history. There are two solutions: put the password and user name in a file, refer to a guide here, in this post I will not introduce this. You can also prepend the command with space, which explicitly ignores this command in the bash history.
- User-created in this command has the highest database privilege.
Command explanation:
-e MONGO_INITDB_ROOT_USERNAME=transang-e MONGO_INITDB_ROOT_PASSWORD=transang-passwordtransangandtransang-passwordwith appropriate values.--auth: this flag can be dropped if `-e MONGO_INITDB_ROOT_USERNAME=transang -e MONGO_INITDB_ROOT_PASSWORD=transang-passwordis presented. However, I recommend explicitly set this--authflag to ensure the secured mode.
Part 3: secure a currently running mongodb server with a password
3.1 Setup password security
Assume that there is a mongodb server is running without authentication (password protected). For e.g. use the command in part 1 to create an instance
Firstly, access to the database to setup password authentication
docker exec -it mongo mongoexec: execute a command in a running instance-it: initiate a terminal that can interact with the user (interactive mode + tty)mongo: name of the instance specified in part 1mongo: the command to be executed mongo client in the instance
After executing this command, you will get into the mongo instance environment
There will be some warnings that appear as you have not set up authentication for the database server. After going through this part, there should have zero warning.
Run the following command from the mongo command prompt.
use admin
db.createUser({
  user: 'transang',
  pwd: '6wryfFadhGB57xhlTY63Gook',
  roles: [{
    role: 'readWrite',
    db: 'transang'
  }]
})
In the above snippet, the user name transang with a password 6wryfFadhGB57xhlTY63Gook had been created with readWrite role for a database named transang. This configuration prevents the created user from having too high a privilege.
The roles parameter in the above command can be changed to assign an appropriate role to the user. The list of roles can be referred to from here. For example, root role is used to create a root user and is used with roles: ['root].
3.2. Confirm the authentication configuration
Exit mongo environment with Ctrl-D, stop the database server and start it again with --auth flag appended
docker container stop mongo; docker run --name mongo -p 27017:27017 -v $HOME/mongo:/data/db --rm -d mongo:4.0.4 --authRe-access the database to confirm the authentication configuration
docker exec -it mongo mongo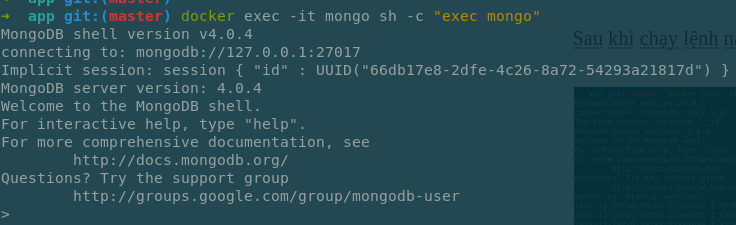
In the mongo environment, execute these commands
use transang
show collections
If the authentication configuration has been set up correctly, there will be a warning Warning: unable to run listCollections, attempting to approximate collection names by parsing connectionStatus
Continue with the following command in the mongo environment to try using authentication information setup in the previous step
use admin
db.auth('transang', 'transang-password')
use transang
show collections
The list of collections will appear without any warning.
3.3. Update authentication information
It is not rare that one wants to update setup authentication information (user name or password, update privilege, forget the current password), for e.g. when the current password is exposed, periodically change the password to improve security, ...
In these cases, you can remove the user and set up a new one with the updated information. To remove a user use
dropUser('transang')To execute this command, one of 2 following conditions must be satisfied
- Mongodb server starts in non-secure mode. i.e. without
--author none of two flags-e MONGO_INITDB_ROOT_USERNAMEand-e MONGO_INITDB_ROOT_PASSWORD. If the instance is started by docker, this can be achieved by stopping the current server and re-starting with appropriate flags. - The current running mongo environment is accessed with admin privilege (root user)
Part 4: periodically backup mongodb database to AWS s3
4.1 Backup
This section introduces the way to periodically backup a collection to AWS s3, send a slack message if there is an error that occurs while the backup.
The idea behind this process is very simple. Uploading to AWS s3 can be replaced by pushing backed up data to a Github repo, copy to another server, ...
In order to prevent too long post, I will not show how to set up an AWS s3 account, slack incoming web hook. Readers should set up them yourself. Note that it is highly recommended to enable versioning in AWS s3 config to keep multiple versions of the same file (similar to git).
According to the size and importance of the databases, the backup rate should be set appropriately. My personal advice for the small and important database is once per 15 minutes. Here is the configuration
Run command crontab -e from terminal. An editor will appear, go to the end of the file and append the following content
*/15 * * * * docker exec mongo mongodump -d <db-name> --archive=/mongodump.bson --authenticationDatabase admin --username <username> --password <password> && docker cp mongo:/mongodump.bson $HOME/mongodump.bson && aws s3 cp $HOME/mongodump.bson s3://<bucket-name> || curl -X POST -H 'Content-type: application/json' --data '{"text":"Can not backup db"}' <slack-hook-url>Replace variables <db-name>, <username>, <password>, <bucket-name>, <slack-hook-url> by correct values.
File mongodump.bson will be created in $HOME directory, then be uploaded to AWS s3.
If the database is not secured with authentication, you should remove the --authenticationDatabase admin --username <> --password <>
4.2. Restore from backup files
Assume that you already have mongodump.bson file from the previous backup at $HOME directory.
Copy this backup file to the docker instance docker cp $HOME/mongodump.bson mongo:/mongodump.bson.
Note: the following commands will erase everything in the target database. With any mistake, there will be a possibility that any database can be erased completely.
I highly recommend backing up all current data before executing the restoration. With docker, this can be accomplished trivially with sudo cp -Rf $HOME/mongo $HOME/mongo-bak.
4.2.1 If the new database has the same name as the old one's:
docker exec mongo mongorestore --drop --nsInclude "<db name>.*" --archive=/mongodump.bsonReplace <db name> with the database name.
4.2.2 If the new database has a different name from the old one's:
docker exec mongo mongorestore --drop --nsFrom "<source db>.*" --nsTo "<target db>.*" --archive=/mongodump.bsonWhere <source db> is the backed up database's name, <target db> is the name of the new database.
Another note: the --drop flag in the above commands only helps to remove collections from the new database whose names exist in the backed-up database. In other words, if there is a collection named users in the new database while there is not any collection with the same name in the backed up database, this users collection will not be removed from the new database.
Part 5: Connect to mongo database server via mongoose for nodejs users
A note for mongoose users, beside user and pass options, auth: {authdb: 'admin'} is also required to avoid unexpected errors.
import mongoose from 'mongoose'
import chalk from 'chalk'

// mongoose.set('useNewUrlParser', true)
(async () => {
  try {
    await mongoose.connect(process.env.MONGODB_URI, {
      autoReconnect: true,
      family: 4,
      user: process.env.MONGODB_USER,
      pass: process.env.MONGODB_PASS,
      auth: {
        authdb: 'admin'
      }
    })
  } catch (err) {
    logger.error(err)
    logger.log('%s MongoDB connection error. Please make sure MongoDB is running.', chalk.red('✗'))
    process.exit()
  }
})()
In this post, I have introduced how to set up a mongo database server by docker with a configuration that can be used in production. From setup, periodical backup, restoration, connect from nodejs. I also referred to link to my repo which includes a script to simply many steps.
In the end, let me paste some useful commands for future reference.
- To add a new role to an existing user
- Stop current mongo instance:
docker stop mongo - Stop other processes which are using mongo (e.g.: nodejs server ...). Otherwise,
Topology was destroyederror will occur after running the next command - Re-start mongo server without authentication
docker run --name mongo -v $HOME/mongo:/data/db --rm -it -d mongo - Open mongo shell:
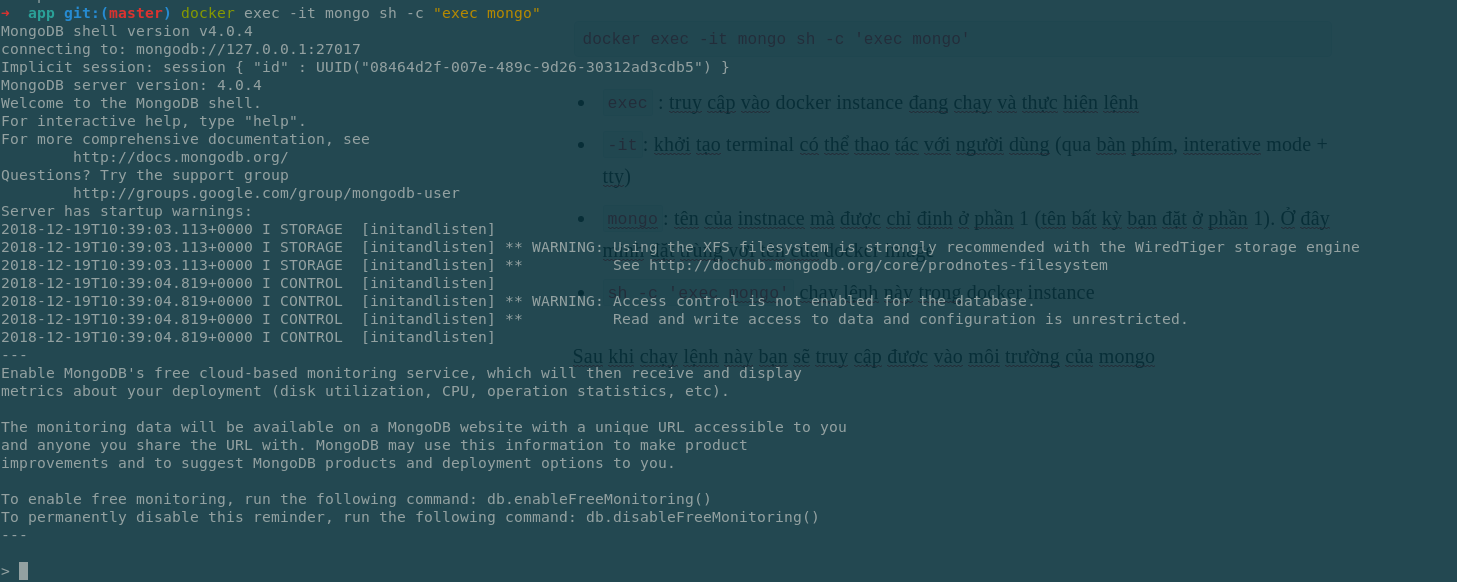
docker exec -it mongo sh -c "exec mongo" - Open admin database
use admin - Add a role to an existing user:
db.grantRolesToUser('transang', [{role: 'readWrite', db: 'transang-log'}]) - Quit mongo shell and restart the server with authentication:
docker container stop mongo; docker wait mongo; docker run -e MONGO_INITDB_ROOT_USERNAME=transang -e MONGO_INITDB_ROOT_PASSWORD=root_pass --name mongo -p 27017:27017 -v $HOME/mongo:/data/db --rm -it -d mongo --auth
Part 6: Convert the mongodb server to a replica set
From the official document, mongodb recommends converting the standalone server to a replica set in a production environment.
Use standalone instances for testing and development, but always use replica sets in production.
Converting a server to a replica set (or join a server to an existing replica set) allows the database to be replicated in multiple member servers, which improves the server's availability and durability. A standalone server is a type of server that cannot join any replica set. Without an explicit configuration, a mongodb server is created in standalone type.
It is possible to set up a replica set with a single server (of course, multiple servers are also accepted). In this section, I only explain how to set up a replica set with a single server (instance).
Step 1: Stop the server if it is running and, restart the server again with the --replSet flag
docker container stop mongo; docker run -e MONGO_INITDB_ROOT_USERNAME=transang -e MONGO_INITDB_ROOT_PASSWORD=transang-password --name mongo -p 27017:27017 -v $HOME/mongo:/data/db --rm -d mongo:4.0.4 --auth --replSetStep 2: Check if the server has a replica set up with
docker exec -it mongo mongo --authenticationDatabase admin --username transang --password transang-password --eval "rs.status()"If there is no replica set up
MongoDB shell version v4.4.1
connecting to: mongodb://127.0.0.1:27017/?authSource=admin&compressors=disabled&gssapiServiceName=mongodb
Implicit session: session { "id" : UUID("9f3f2528-a356-4e9c-b88e-e888d76df60c") }
MongoDB server version: 4.4.1
{
	"ok" : 0,
	"errmsg" : "no replset config has been received",
	"code" : 94,
	"codeName" : "NotYetInitialized"
}
Otherwise,
MongoDB shell version v4.4.1
connecting to: mongodb://127.0.0.1:27017/?authSource=admin&compressors=disabled&gssapiServiceName=mongodb
Implicit session: session { "id" : UUID("b199dc25-7f71-457a-b3c5-759e321afb6d") }
MongoDB server version: 4.4.1
{
	"info2" : "no configuration specified. Using a default configuration for the set",
	"me" : "1eebade9fe6e:27017",
	"ok" : 1
}
Set up a replica set if it does not exist with the following command
docker exec -it mongo mongo --authenticationDatabase admin --username transang --password transang-password --eval "rs.initiate()"These commands can be combined into a single script with a conditional check.
Note: jq util is required and can be installed with sudo apt install -yq jq
if [[ $(docker exec -it mongo mongo \
        --authenticationDatabase admin \
        --username transang \
        --password transang-password \
        --quiet \
        --eval "JSON.stringify(rs.status())" | jq -r .ok) == 0 ]]; then
        docker exec -it mongo mongo \
            --authenticationDatabase admin \
            --username transang \
            --password transang-password \
            --eval "rs.initiate()"
    fi
Part 7: upgrade a major version
You might think that just changing the docker version, then restarting the server is enough. You try it in your local and everything works. Yes, it works, but you will fail in the next major update because the upgrade requires a little more configuration.
Here is how to make a complete major upgrade. Suppose that you are using version 4.0.x, and want to upgrade to 5.0.x.
Note: if your MongoDB is set up with a password, you must add --authenticationDatabase admin --username <username> --password <password> to the command.
- Step 1: check current version compatibility is 4.0
docker exec -it mongo mongo --eval "db.adminCommand( { getParameter: 1, featureCompatibilityVersion: 1 } )"Should print:
MongoDB shell version v4.0.4
connecting to: mongodb://127.0.0.1:27017
Implicit session: session { "id" : UUID("a8623511-df28-47fc-bef2-a7402acccee5") }
MongoDB server version: 4.0.4
{
	"featureCompatibilityVersion" : {
		"version" : "4.0"
	},
	"ok" : 1,
	"operationTime" : Timestamp(1650210625, 1),
	"$clusterTime" : {
		"clusterTime" : Timestamp(1650210625, 1),
		"signature" : {
			"hash" : BinData(0,"hcUJlBheg8w4V9An8xsQu8C1Cf0="),
			"keyId" : NumberLong("7060264289969373185")
		}
	}
}
- Step 2: upgrade from 4.0.x to 4.2.x
docker container stop mongo
docker run --name mongo -p 27017:27017 -v $HOME/mongo:/data/db --rm -it mongo:4.2.19- Step 3: set version compatibility from 4.0 to 4.2
docker exec -it mongo mongo --eval "db.adminCommand( { setFeatureCompatibilityVersion: '4.2' } )"- Step 4: restart the server
docker container stop mongo
docker run --name mongo -p 27017:27017 -v $HOME/mongo:/data/db --rm -it mongo:4.2.19- Step 5: upgrade from 4.2.x to 4.4.x
docker container stop mongo
docker run --name mongo -p 27017:27017 -v $HOME/mongo:/data/db --rm -it mongo:4.4.13- Step 6: set version compatibility from 4.2 to 4.4
docker exec -it mongo mongo --eval "db.adminCommand( { setFeatureCompatibilityVersion: '4.4' } )"- Step 6: restart the server
docker container stop mongo
docker run --name mongo -p 27017:27017 -v $HOME/mongo:/data/db --rm -it mongo:4.4.13- Step 7: upgrade from 4.4.x to 5.0.x
docker container stop mongo
docker run --name mongo -p 27017:27017 -v $HOME/mongo:/data/db --rm -it mongo:5.0.7- Step 8: set version compatibility from 4.4 to 5.0
docker exec -it mongo mongo --eval "db.adminCommand( { setFeatureCompatibilityVersion: '5.0' } )"- Step 9: confirm the latest version compatibility.
docker exec -it mongo mongo --eval "db.adminCommand( { getParameter: 1, featureCompatibilityVersion: 1 } )"Shoud print
MongoDB shell version v5.0.7
connecting to: mongodb://127.0.0.1:27017/?authSource=admin&compressors=disabled&gssapiServiceName=mongodb
Implicit session: session { "id" : UUID("7c44769c-1015-46d9-b591-bc1eb54c676f") }
MongoDB server version: 5.0.7
{
	"ok" : 1,
	"$clusterTime" : {
		"clusterTime" : Timestamp(1650210883, 3),
		"signature" : {
			"hash" : BinData(0,"5ghZd7bJDlcSkZeBGEIe7KcryiU="),
			"keyId" : NumberLong("7060264289969373185")
		}
	},
	"operationTime" : Timestamp(1650210883, 3)
}
Part 8: configure SSL certificate (TODO)
(TODO) It is too long. I will come back later on this part.
